HQ ProgKey
The HQ ProgKey is an 8 pin probe with two rows of 4 pins. It works great for interfacing with a variety of lights since it can be used for nearly any of the common layouts by matching the wiring of the pins to whichever light needs to be updated.
The following materials can be used to craft one of these probes:
One or more HQ ProgKey PCBs ordered from OSHPark.
Warning
When ordering these boards from OSHPark, select 2 oz copper, 0.8mm thickness or the board will be the wrong size.
Soldering paste and a Reflow plate or equivalent, or a soldering iron and typical soldering supplies.
Solder the pogo pins to both sides of the board and then solder the Dupont connector pins in whichever orientation is most convenient.
Tip
Soldering the pogo pins to the board can be extremely tricky! Have patience, and don’t be afraid to pull the pins off, clean up, and start over.
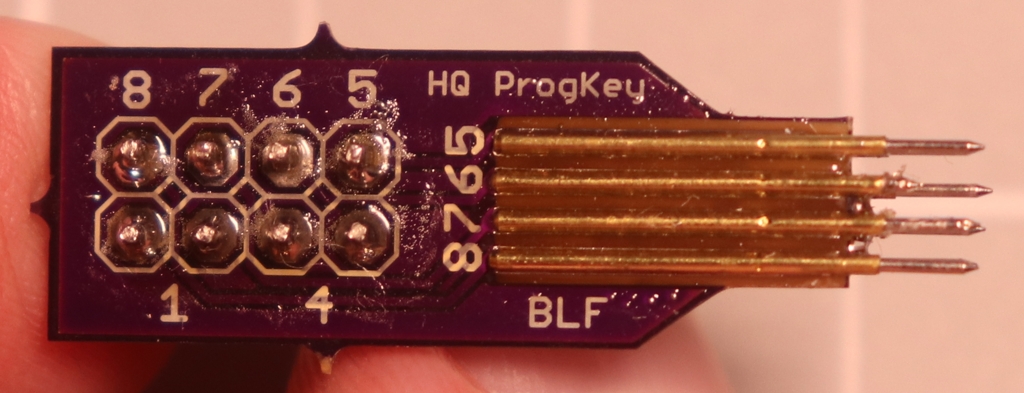
HQ ProgKey (Top)
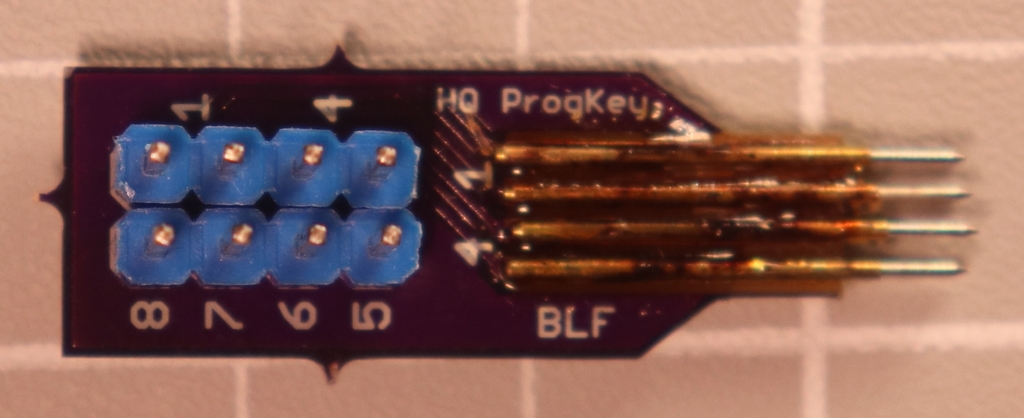
HQ ProgKey (Bottom)
Using HQ ProgKey for 3 over 3 Pads
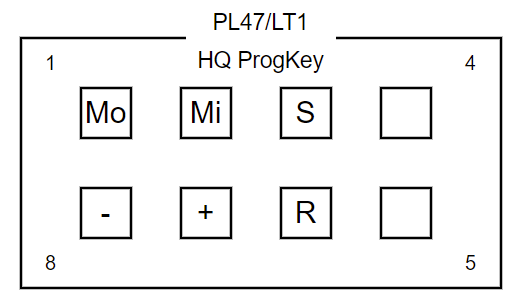
With 4 over 4 pins on the HQ ProgKey there are four ways to wire up the probe, either using pins 1-3 and 6-8, or pins 2-4 and 5-7 and in each of those cases the wires could be arranged with either side of the probe as the top side. The diagram below uses the first layout. Any way is OK so long as the probe is properly aligned when connecting to the light.
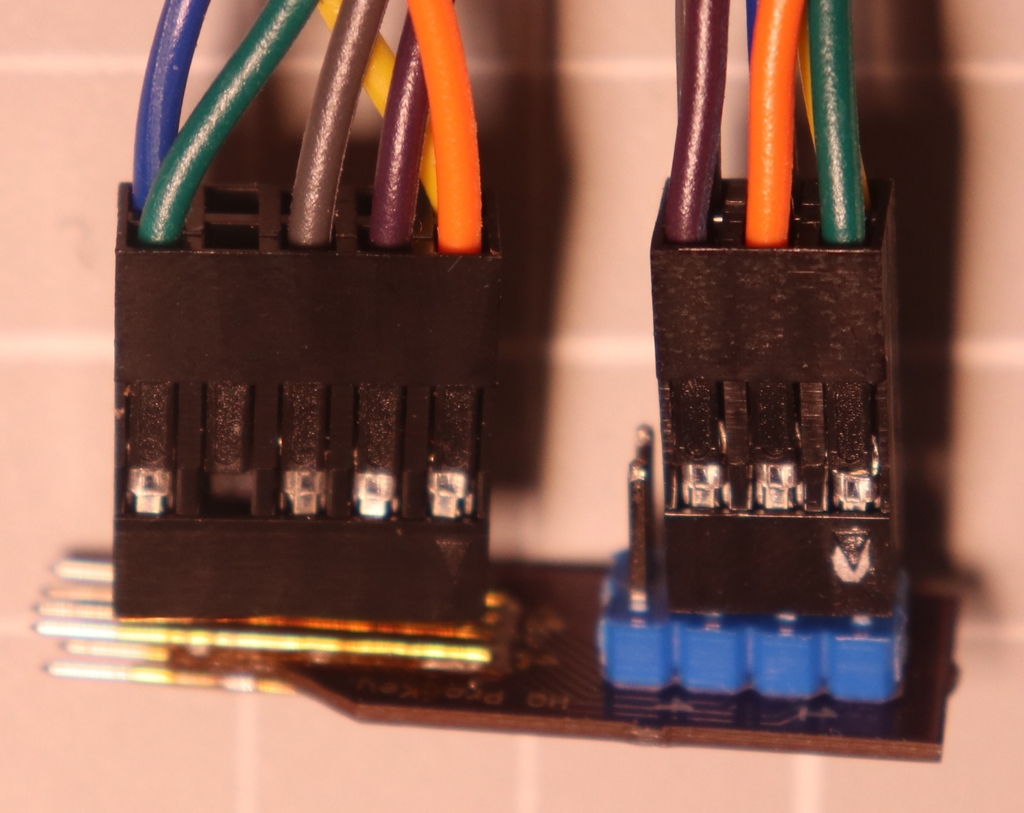
Pins on HQ ProgKey probe for connecting to USBASP for 3 over 3 Pads
Use jumper wires to connect from the probe to the USBASP board following the layout in these images.

USBASP pins for connecting to HQ ProgKey for 3 over 3 Pads
Make a note of which pins are which so that when the probe is aligned with the board all of the proper pins make contact.
HQ ProgKey wired for 3 over 3 (Top)
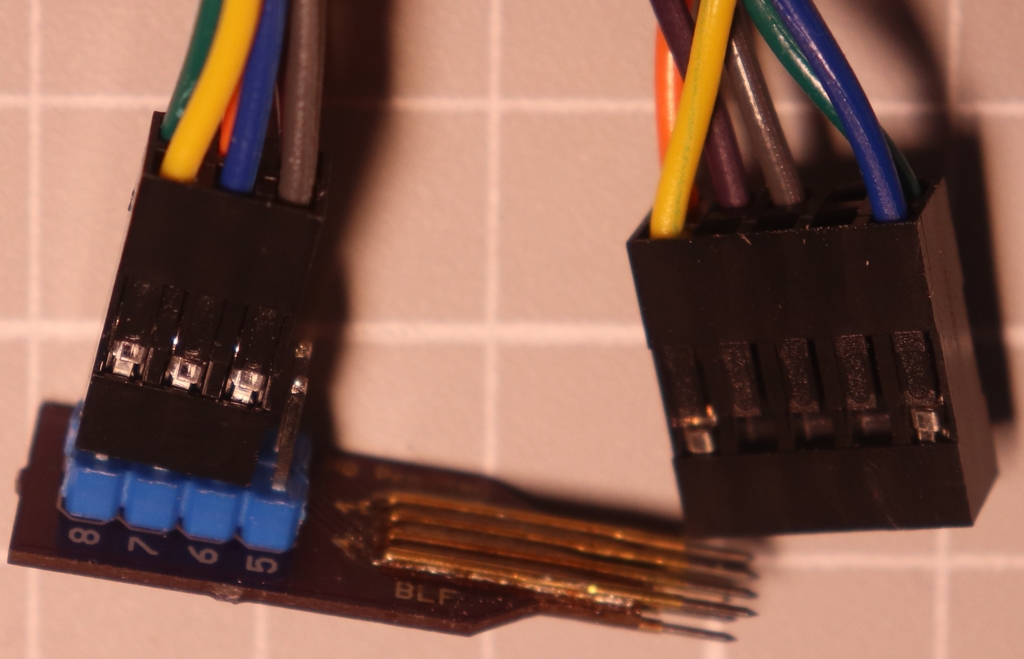
HQ ProgKey wired for 3 over 3 (Bottom)
Using HQ ProgKey for 3 Pin UPDI
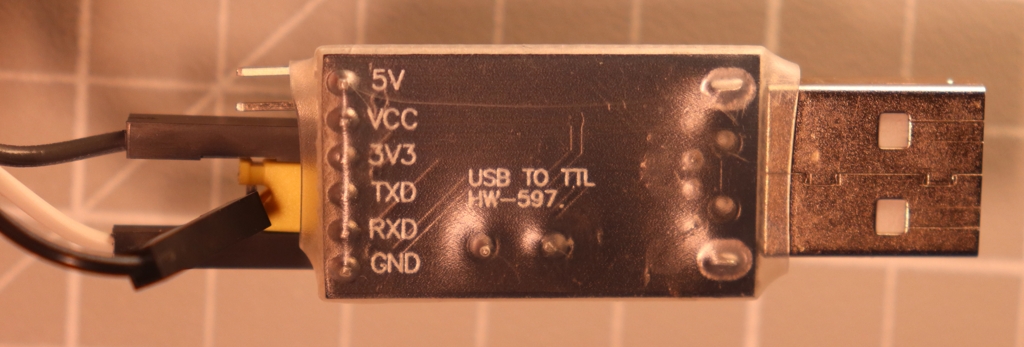
Any three pins in a row on the probe can be used to connect with the CH340 programmer, but for simplicity’s sake, this example uses pins 1-3.
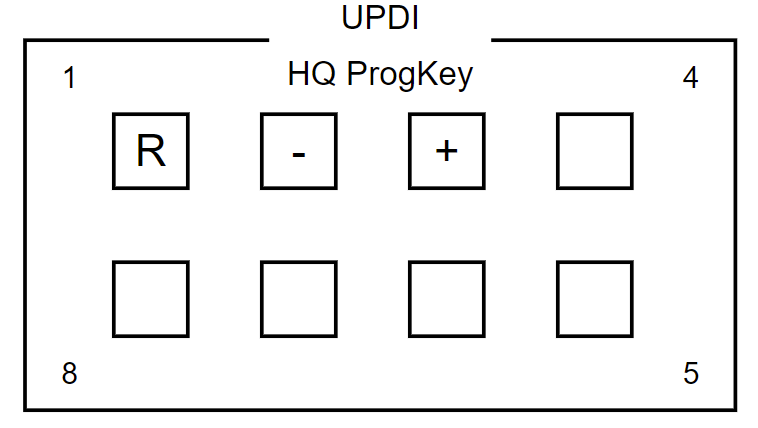
Pins on HQ ProgKey probe for connecting to CH340
Connect a socket-to-socket jumper wire from
+on the probe toVCCon the CH340 board.Connect a socket-to-socket jumper wire from
-on the probe toGNDon the CH340 board.Connect a socket-to-plug jumper wire from
Ron the probe to bothRXDandTXDon the CH340 board.
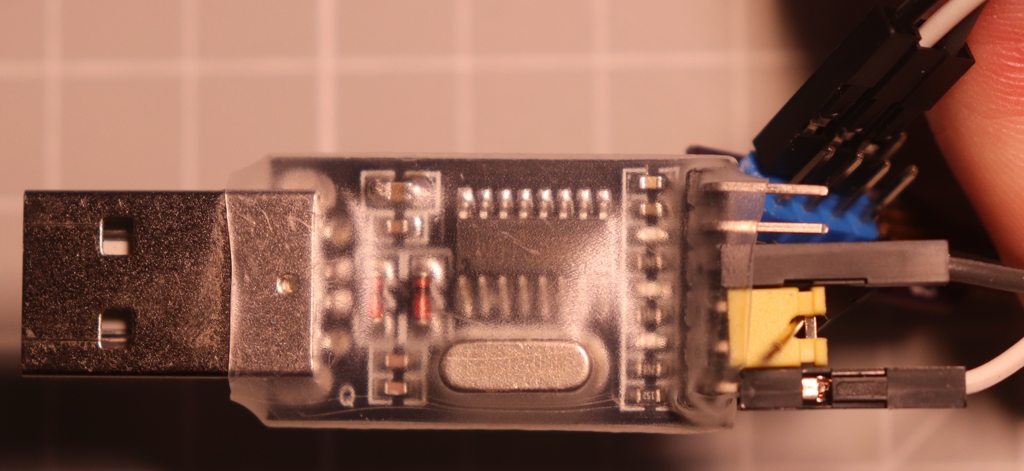
HQ ProgKey connected to CH340 Programmer
The CH340 board linked above has a jumper between RXD and TXD and a plug
Dupont connector can rest in the opening of the jumper and make contact, so it
touches both pins.
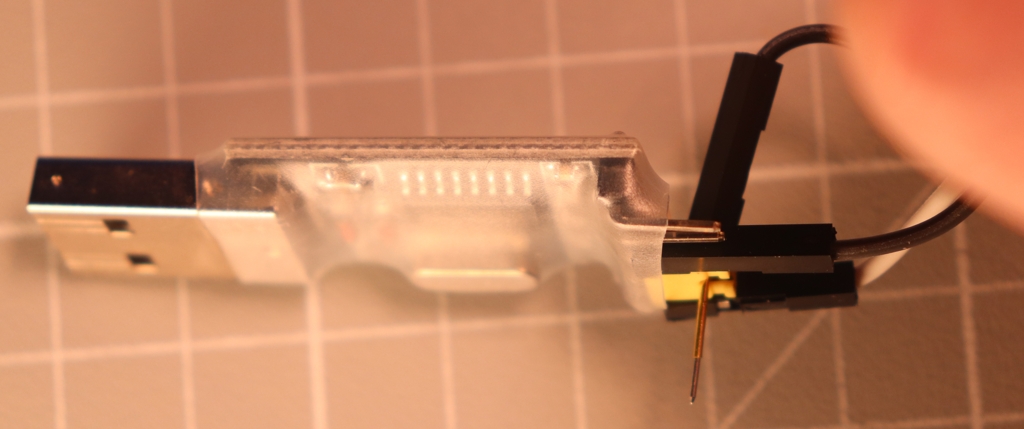
Bridging RX and TX on the CH340 Board (Side)
Bridging RX and TX on the CH340 Board (Bottom)
Alternately, some people have chosen to solder the wire to the jumper, or made A
cable to connect both pins, for example. As long as the R contact on the
probe makes good electrical contact with both RXD and TXD it will work.