Flashing Hardware
After figuring out how to access the light controller chip to update the firmware, the next step is determine the hardware necessary to communicate with the controller.
General Hardware Information
There are a few common terms used in this section, including:
- Serial Programmer
This is a board plugged into the PC which allows it to perform serial communication with other chips for programming. Typically it plugs into the computer with USB and then has other pins which can be used to connect to a probe or clip which directly connects with a controller chip.
This may also be referred to as an ISP (In-System Programmer), ASP (AVR Serial Programmer), or SPI (Serial Peripheral Interface) depending on the hardware.
- Wiring
Wire to connect between the serial adapter and the probe. This can be a ribbon cable with socket connectors on both ends, or it can be individual wires with plug or socket Dupont connectors, or in some cases it could even be bare wires soldered to a serial adapter and/or probe.
- Probe
A small PCB or other retaining setup which contains pogo pins or other method of making direct contact with flashing pads or a chip.
- Pogo Pins
Long metal pins with spring-loaded tips which make contact with flashing pads. Some have pointed ends, others have rounded or flat ends. The pointed end seem to be most common with the style of flashing pads used on flashlights.
Pogo pins are typically soldered to a probe PCB in a specific layout to match with the number and spacing of pads on a light. Some pins can be soldered to wires directly for use in other ways. Some can also push fit into socket Dupont connectors.
- UPDI
Unified Program and Debug Interface, a protocol used to communicate with controller chips.
Programmers
There are two main programmer boards used with these lights: USBASP and CH340. Kits usually come with one, the other, or have the appropriate chip integrated. Whichever board is used, either on their own or as a part of a kit, it may need its drivers setup in the operating system or to have its port identified.
Pre-Made Complete Kits
By far the easiest method to update lights is by using a pre-made kit crafted specifically for the type of controller and interface in the light. There are a few of these out there, and some can be used as a basis for adapting to other lights as well.
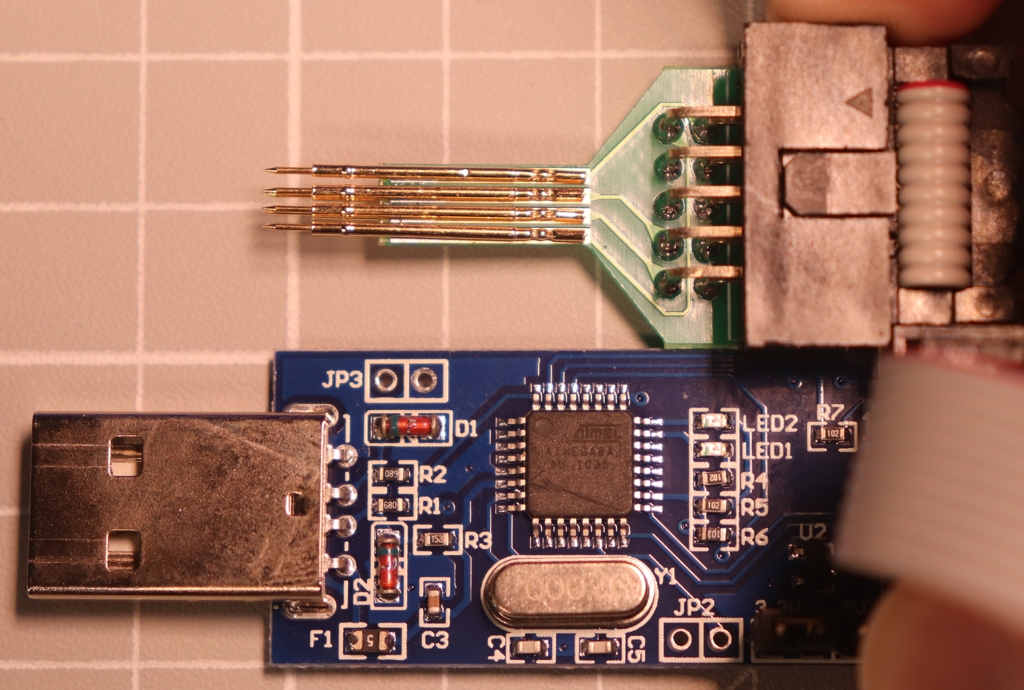
Hank’s Kit (USBASP and 4 over 2 Probe)
The Flashing Kit from Hank contains everything necessary to update Emisar and Noctigon lights using the 4 over 2 pin style layout. It has a USBASP serial programmer, a probe with pogo pins in the 4 over 2 layout, and a cable to connect the USBASP board to the probe.
See also
Hank’s Flashing Kit - USBASP Board and 4 over 2 Probe
3 Pin UPDI Programmers from the_gchart
u/the_gchart on Reddit makes and sells 3 pin UPDI programmers for use with lights using 3 pad layouts. These are all-in-one boards with the serial programmer and pogo pins all on a single PCB with a USB port so there is no need for separate programmer and probe, it’s all in a single package. These work extremely well and are very easy to use.
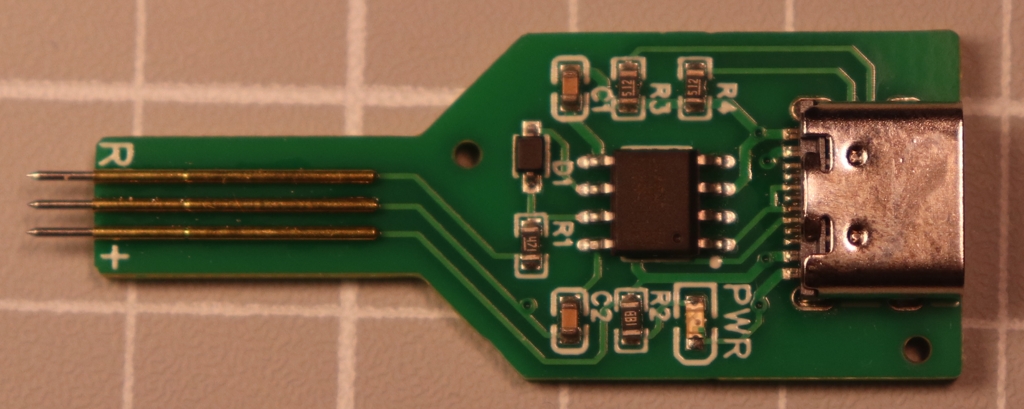
3 Pin CH340 All-in-One USB C UPDI Programmer from the_gchart
Check the monthly Buy/Sell/Trade thread in r/flashlight on Reddit for his post(s) and send a PM to order one or they are also available via UPDI Programmer by ghart (US Source).
Note
Some of these adapters have a USB C port but require USB A on the other end. Current revisions can also use USB C on both ends (C to C).
He has also posted the PCB designs for various probes he makes on OSHPark for those who would prefer to DIY.
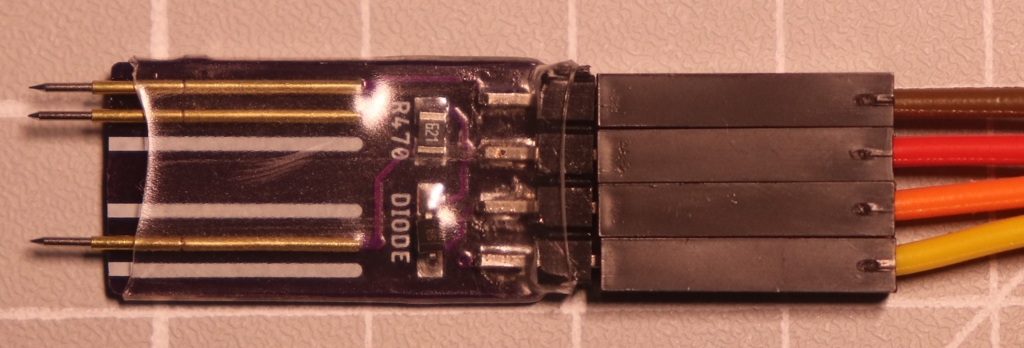
2+1 Pin Probe for SC21 Pro from the_gchart
Adapting Kits or DIY Probes
If there isn’t a pre-made kit, it is also possible to adapt the other kits or make/improvise other solutions to get the job done. When working with these, some combination of the following parts is probably necessary:
USBASP serial programmer for attiny85, attiny1634, and similar lights
Serial USB to TTL CH340 Module device for programming 3 pin UPDI lights, such as those using avr32dd20 and attiny1616
Jumper wires with Dupont connectors for making connections between the programmer board and probe
Pogo pins for either soldering to a PCB to make a probe or to use with other crafting methods for constructing a makeshift probe.